Hour 1
Hear Joe’s tips for hanging holiday lights, options for installing a side wall tile backsplash, repairing a rotten door jamb, and more.
Tips for Hanging Holiday Lights

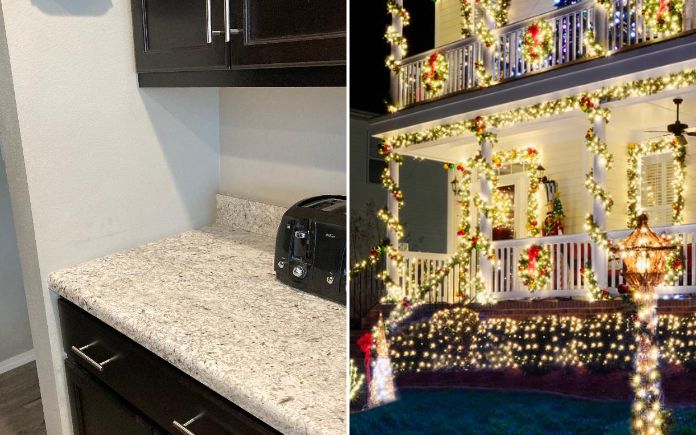
Winter’s almost here, and as the days are getting shorter, there’s one bright spot on the horizon — it’s now time to decorate your home with holiday lights!
When hanging holiday lights on your home, switch up the types to add some variety.
Here are some of Joe’s tips for hanging outdoor Christmas lights.
- To highlight your roof, use traditional C9 or icicle lights. Run C9 string lights along the eaves — usually attached to the gutters — and then up the gable ends to the peak of the roof. You can also place C9 light strands vertically down each corner of the house to outline your home for more brightness and definition. Or, string icicle lights from second-story balconies or perimeter joists of decks, or hang them from rain gutters.
- For wrapping columns, railings or trees, use mini string lights. Mini strings have bulbs closely spaced along the strand for more lights overall, so they’re ideal for spiral-wrapping columns, posts, and porch and deck railings.
- To illuminate shrubs, bushes and hedges, use net lights. These lights are easy to drape over contoured surfaces.
- Use spotlights to illuminate certain areas of your home, like where wreaths are hanging.
Quick tip: Never connect strings of lights together that are different light counts. For instance, don’t connect a 100-light string to a 50-light string. If you mismatch the light counts, the string with the fewest bulbs with burn out prematurely.
Read Joe’s full article on Popular Mechanics: The Ultimate Guide to Hanging Holiday Lights
Does a Side Wall Need a Tile Backsplash?
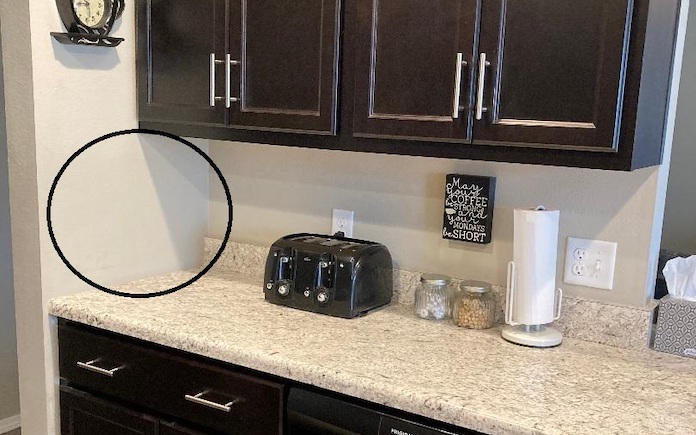
A homeowner is installing a tile backsplash in his kitchen between the upper cabinets and back edge of the countertop. But first, he wants to know the standard installation — if any — on the blank side wall.
“Do you keep that blank…? Tile it from the bottom of the top cabinet all the way down…? Or add an edging piece on the bottom? (To match the other wall’s back edge.) My main two concerns are the look, and if it does not have a backsplash then it leaves that part of the wall unprotected,” he says.
Essentially, what he’s asking is how to finish off that edge that’s not capped off by the cabinets or the countertop backsplash, seen in the photo. There are several things you can do — it just boils down to personal preference.
What we’ve done most often in a case like this is not install the backsplash on that outer wall — just butt the backsplash up to the corner where the walls meet. Then, leave the tile backsplash between the cabinet and counter.
Of course, this approach doesn’t give that outer wall any protection.
However, we’ve also brought the tile so it’s even under the wall cabinet and matched it to the top of the countertop. Then, we’ve added a metal strip at the top and end of the backsplash to give it a finished look.
Depending on the type of tile you use, you can use grout instead. Just be sure to use some painter’s tape to get a clean line.
A middle-of-the-road option is to continue the backsplash but only to the point of the upper cabinet’s overhang. Don’t extend the backsplash to the front edge of the countertop.
This way, the backsplash wraps around the corner but doesn’t stick too far out.
Repairing a Rotting Door Jamb

When you’re dealing with damaged woodwork, the question that always follows is, “Do I repair it or do I replace it?”
The answer can be found in the purpose of the damaged component. If its function is purely aesthetic — like molding, trim, or siding — then it can often be patched.
Automobile body filler, like Bondo, is a great choice because this two-part compound dries very hard, very quickly, so you can fill voids and make repairs very easily.
Once it’s dry, sand it just like wood to create a smooth, finished surface.
Watch: How to Patch Damaged or Rotten Wood
Hour 2
Hear tips for hiding electronic cords, addressing condensation issues on A/C ducts and more.
Tip for Hiding Electronic Cords
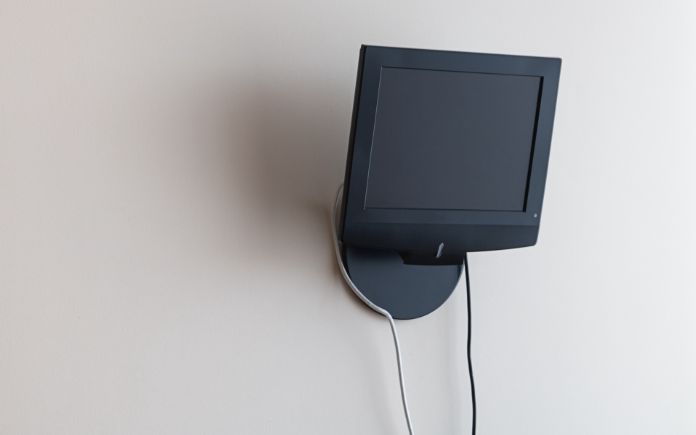
A homeowner is looking for advice on how to hide ugly electronic cords.
“We remodeled our family room recently and installed a new flat-screen TV and sound system. The TV is mounted to the wall and the rest of the electronic equipment is on nearby shelves. The problem is that there are wires everywhere. We tried tucking them away and securing them with zip ties, but it’s still an ugly, tangled mess. Do you know how I can hide the wires from view?” he asks.
This is a very common problem with several different approaches to solve it.
The easiest option is to use a cable raceway. It’s a plastic cover that attaches to the wall with adhesive. You can paint it to match the wall, and that way, you won’t see any dangling wires.
However, nothing is as good as routing the lines behind the wall. If the equipment can be located below the TV, like on a shelf, you can drop the wires inside the wall and bring them out by the electrical outlet.
Addressing Condensation Issues on A/C Ducts
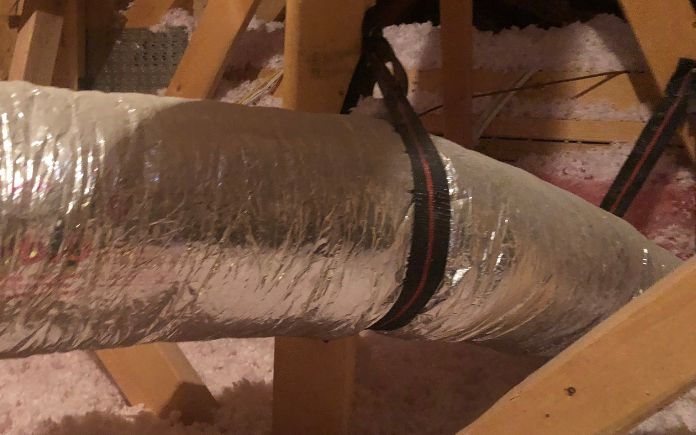
A homeowner is concerned about humidity and condensation problems with his insulated A/C ducts. They’re wrapped with foil-faced insulation, which he says appears to be in good condition.
He wants to know: “Can I simply wrap the ducts with another layer of insulated foil-faced duct insulation? Or, can I drape unfaced batts over and around the ducts? Or, would it be best to remove all the existing insulation and start from scratch?”
Oftentimes, A/C ducts are insulated but not sealed. You’re supposed to seal them with a mastic. Brush it on all the joints and it stops the flow of air from leaking out, then you insulate it.
Since the insulation is in good condition, we suggest removing part of it to make sure these joints are sealed.
If they aren’t, remove the insulation and seal the joints, then re-apply the insulation. As always, it never hurts to add more insulation around them.
Best New Products
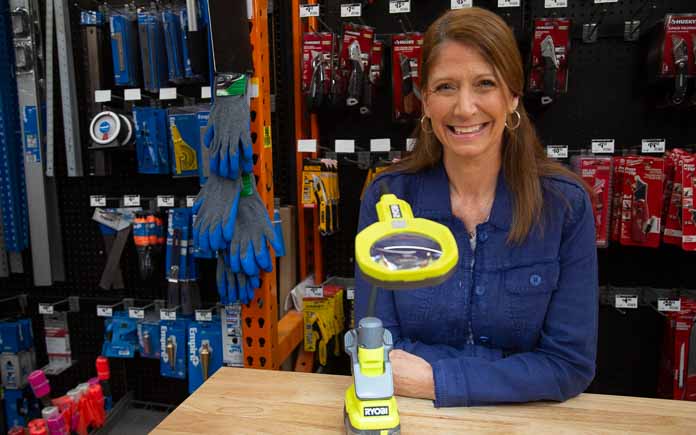 |
Ryobi’s new magnifying glass with light not only makes reading fine print easier, but it also has clamps to stay put in your workspace. Learn more >> |
Simple Solutions
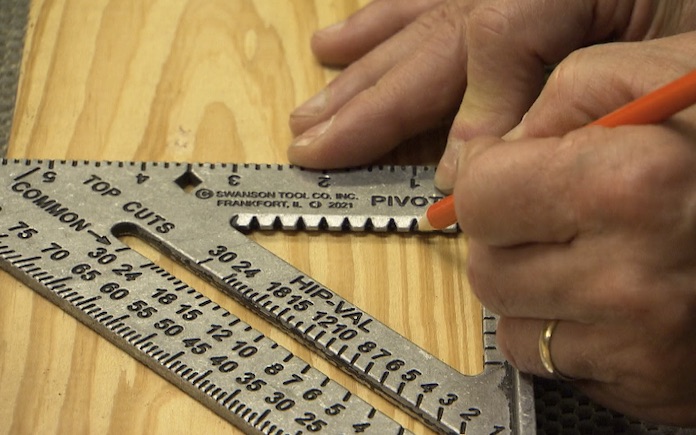
5 Ways to Use a Speed Square — The ingeniously simple speed square is an efficient and useful hand tool. Here are five of its popular uses:
- Because of its triangular shape, a speed square is great for marking 90-degree square crosscuts and 45-degree lines.
- A speed square can be used as a protractor. Hold its pivot point against the edge of the board and then rotate to mark angles between zero and 90 degrees.
- A speed square has quarter-inch notches that can be used to quickly scribe lines onto a board. Put your pencil into one of the notches and slide it along the board.
- Most speed squares have a diamond cutout exactly 3½-inch from the edge of the square, which is exactly the width of a 2×4. Put your pencil in the cutout and slide it along the board to draw a line that’s exactly the width of a 2×4.
- Saw guide — hold the square against the board’s edge and guide the saw right along the edge of the square to produce a perfectly straight, square cut.
Watch: 5 Ways to Use a Speed Square
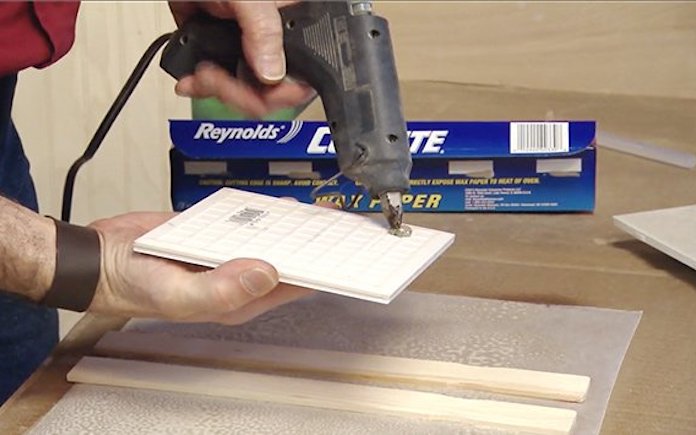
Homemade Trivet — Protect tabletops and counters by making a trivet from a leftover ceramic tile.
Start by spraying a light coating of cooking oil spray onto a piece of wax paper.
Then, lay two paint sticks across the wax paper. Next, use a hot-melt glue gun to put a half-inch-diameter dab of hot glue onto each back corner of the tile.
Then, immediately press the tile down onto the wood sticks. The sticks serve as spacers to ensure that each glue pad is exactly the same thickness, and the cooking oil prevents the glue from sticking to the wax paper.
Let the glue harden for a few minutes, then peel off the wax paper.
Watch: How to Make a Ceramic Tile Trivet
Products and Links Mentioned
This page contains affiliate links. If you purchase a product from these links, we will earn a small commission at no additional cost to you.
Further Reading


